


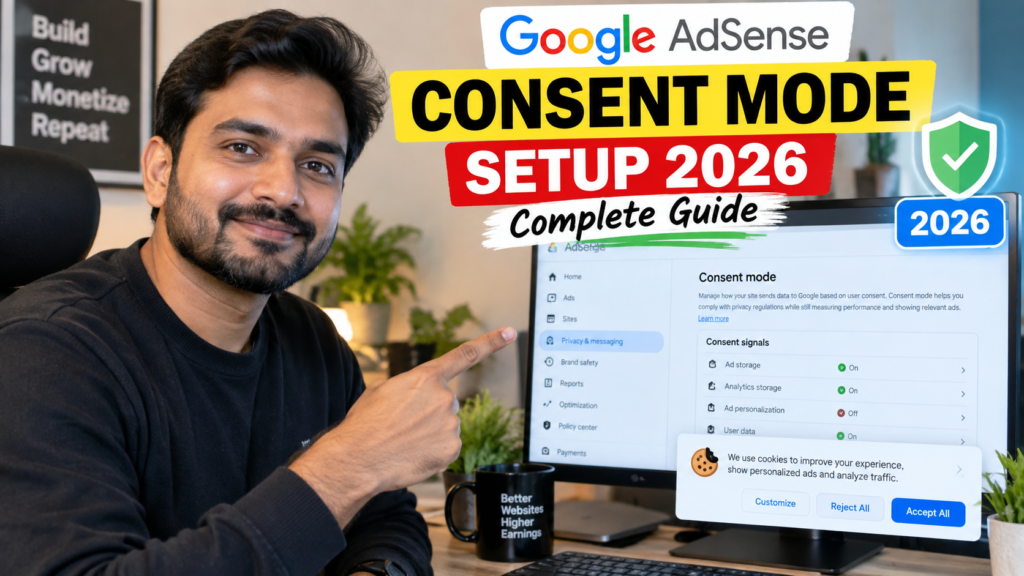
A correct Google AdSense Consent Mode setup helps Google Analytics, Google Ads and other supported Google tags adjust their behaviour according to a visitor’s consent choices.
Consent Mode does not create a cookie banner. Instead, it receives consent states from a Consent Management Platform, or CMP, and communicates those states to supported Google tags.
Google’s AdSense CMP can interpret existing choices collected through European regulations messages for advertising storage, advertising personalization, advertising user data and analytics storage. These settings apply to eligible visitors in the European Economic Area, the United Kingdom and Switzerland. 3
The implementation must be carefully configured. Enabling a banner without sending correct consent signals—or sending the signals after tags have already fired—can create inaccurate analytics and ineffective privacy controls.
This guide explains the consent signals, available implementation types, Google CMP settings, code examples and testing process.
What Is Google Consent Mode?
Google Consent Mode is a framework that changes how supported Google tags and SDKs behave based on a user’s consent choices.
It can be used with:
- Google Analytics
- Google Ads conversion tracking
- Google Ads remarketing
- Floodlight
- Conversion Linker
- The Google tag
When a visitor grants consent, the relevant tags can use their normal storage and measurement features. When consent is denied, their behaviour changes according to the implementation type and individual consent signal. 4
Consent Mode is not responsible for asking visitors for permission. You still need:
- A consent banner or CMP
- A method for recording the visitor’s choice
- Consent signals communicated to Google
- Tags configured to respect those signals
Is Consent Mode Required for an AdSense Website?
AdSense publishers serving personalized ads to users in the EEA, UK and Switzerland must use a Google-certified CMP integrated with the IAB Transparency and Consent Framework.
This CMP requirement applies to AdSense publisher advertising. Consent Mode is particularly relevant when the website also uses products such as Google Analytics, Google Ads or Floodlight. 5
For example, your website might use:
- AdSense to display advertisements
- Google Analytics 4 to measure visitors
- Google Ads to promote your website
- Google Ads remarketing
- Conversion tracking for form submissions
The European regulations message handles the AdSense consent flow through the TCF framework. Consent Mode allows the same visitor choices to be interpreted by other supported Google products.
Therefore, do not assume that enabling Consent Mode replaces your AdSense CMP or European regulations message.
Consent Mode v2 vs TCF v2.3
Consent Mode v2 and TCF v2.3 are different systems.
| Feature | Consent Mode v2 | IAB TCF v2.3 |
|---|---|---|
| Developed by | IAB Europe | |
| Primary purpose | Communicate consent states to Google tags | Standardize transparency and consent across advertising vendors |
| Main signals | Four Google consent parameters | TC string and vendor-purpose signals |
| Used by | Google Analytics, Google Ads and supported tags | CMPs, publishers and advertising vendors |
| Creates banner | No | CMP provides the user interface |
| AdSense connection | Supports related Google-product signals | Used for AdSense European consent requirements |
AdSense European regulations messages currently support TCF v2.3. Google’s CMP can also interpret choices from those messages for Consent Mode’s advertising and analytics signals. 6
A website may therefore use both systems:
- TCF v2.3 for the AdSense and advertising-vendor consent framework
- Consent Mode v2 for supported Google measurement and advertising tags
Four Main Consent Mode v2 Signals
A current Google AdSense Consent Mode setup should account for four core signals.
| Consent signal | Purpose |
|---|---|
ad_storage |
Controls storage related to advertising, such as advertising cookies |
ad_user_data |
Controls whether user data can be sent to Google for advertising purposes |
ad_personalization |
Controls personalized advertising |
analytics_storage |
Controls storage related to analytics, such as analytics cookies |
Google added ad_user_data and ad_personalization to the earlier consent-mode implementation containing ad_storage and analytics_storage. Current Consent Mode v2 implementations should handle all four relevant parameters. 7
Other Available Consent Types
Google also recognizes additional consent types, including:
functionality_storagepersonalization_storagesecurity_storage
These can be useful for custom or third-party tags. However, they are separate from the four primary Consent Mode v2 signals used for Google advertising and analytics. 4
Basic vs Advanced Consent Mode
Google offers two primary implementation approaches.
Basic Consent Mode
With Basic Consent Mode, supported Google tags are blocked until a visitor interacts with the consent banner.
Before the visitor grants consent:
- Google tags remain blocked.
- No consent status is sent to Google.
- No pre-consent measurement data is transmitted.
- Conversion modelling uses a more general model.
If the visitor rejects consent, the blocked tags remain inactive.
Advanced Consent Mode
With Advanced Consent Mode, Google tags load with default consent states—commonly set to denied—before the visitor makes a choice.
While consent is denied:
- Tags can send consent-status information.
- Measurements are sent without cookies.
- Advertising or analytics cookies are not written for denied storage.
- Google may use the signals for more detailed modelling.
When consent is granted, tags update their behaviour and can send the measurement data permitted by the new consent state. 4
Basic vs Advanced Consent Mode Comparison
| Feature | Basic | Advanced |
|---|---|---|
| Google tags before consent | Blocked | Loaded with default consent settings |
| Pre-consent data | Not sent | Cookieless measurements may be sent |
| User rejects consent | Tags remain blocked | Tags operate with denied consent behaviour |
| Modelling | General modelling | More detailed advertiser-specific modelling |
| Setup complexity | Lower | Higher |
| Suitable choice | Strict tag blocking | Publishers seeking stronger measurement modelling |
Advanced Consent Mode is not automatically the correct legal choice for every website. Your implementation method and default states should follow your organization’s privacy policy and applicable legal requirements.
Google AdSense Consent Mode Setup Using Google’s CMP
If you use the European regulations message in AdSense, follow these steps.
Step 1: Open Privacy & Messaging
- Sign in to AdSense.
- Open Privacy & messaging.
- Find the European regulations card.
- Click Settings.
Step 2: Enable Advertising Consent Mode
Find:
Consent mode for advertising purposesEnable this setting if you want Google Ads, Google Analytics and other supported products on your website to interpret the existing European consent choices for:
- Ad storage
- Ad personalization
- Ad user data
Step 3: Enable Analytics Consent Mode
After enabling advertising purposes, you can also enable:
Consent mode for analytics purposesThis option allows the European regulations message to gather and communicate the visitor’s analytics-storage choice.
The analytics option appears only after Consent Mode for advertising purposes has been enabled. 3
Step 4: Save the Settings
Click Save.
Google states that these settings are updated across all sites and apps for which European regulations messages have been configured. 3
Step 5: Verify the Website
Do not assume that saving the AdSense setting confirms a complete implementation. Test:
- The message itself
- The default consent states
- Consent changes after acceptance
- Consent changes after rejection
- Google Analytics tag behaviour
- Google Ads tag behaviour
- Mobile and desktop pages
Important Regional Behaviour
Google’s CMP updates Consent Mode choices for users who are shown an eligible European regulations message.
This means you must also understand what default consent states apply to visitors outside the EEA, UK and Switzerland. Google recommends defining region-specific default behaviour according to your policies and legal requirements. 6
Do not automatically set all worldwide visitors to granted merely because they are outside Europe. Other privacy laws and Google requirements may apply.
Custom Consent Mode Setup With gtag.js
If your CMP already provides an automatic Consent Mode integration, use that integration instead of duplicating it with custom code.
If you maintain your own consent banner, the default consent command must appear before Google tag commands that send measurement data.
Default Denied Example
<script>
  window.dataLayer = window.dataLayer || [];

  function gtag() {
    dataLayer.push(arguments);
  }

  gtag('consent', 'default', {
    'ad_storage': 'denied',
    'ad_user_data': 'denied',
    'ad_personalization': 'denied',
    'analytics_storage': 'denied',
    'wait_for_update': 500
  });
</script>
Google recommends setting default consent states before config, event or other measurement commands. The optional wait_for_update field allows an asynchronously loaded CMP additional time to send the visitor’s consent choice. 7
Do not increase the waiting period without a technical reason because it can delay measurement.
Update After Accepting All
When the visitor accepts all relevant options, send an update:
<script>
  function grantAllConsent() {
    gtag('consent', 'update', {
      'ad_storage': 'granted',
      'ad_user_data': 'granted',
      'ad_personalization': 'granted',
      'analytics_storage': 'granted'
    });
  }
</script>
The update should occur on the page where the visitor makes the choice and before navigating to another page. Google warns that delaying the update until page unload can cause the browser to cancel relevant measurement requests. 7
Example of Granular Consent
Visitors do not always grant or deny every purpose together.
For example, a user may allow analytics but reject advertising:
<script>
  gtag('consent', 'update', {
    'ad_storage': 'denied',
    'ad_user_data': 'denied',
    'ad_personalization': 'denied',
    'analytics_storage': 'granted'
  });
</script>
Your consent update must reflect the visitor’s actual choices. Do not convert a partial choice into “granted for all.”
Consent Mode Setup With Google Tag Manager
If you use Google Tag Manager, Google recommends using a CMP template that supports Tag Manager’s consent APIs.
General implementation process:
- Open Google Tag Manager.
- Select your website container.
- Open Tags.
- Create a new tag.
- Open the Community Template Gallery.
- Search for your CMP provider.
- Add the provider’s official template.
- Complete its configuration fields.
- Select the Consent Initialization – All Pages trigger.
- Save and preview the container.
- Verify the default and updated consent states.
- Publish the container.
The Consent Initialization trigger is designed to run before other tags. For a custom Tag Manager consent template, Google recommends its dedicated setDefaultConsentState and updateConsentState APIs instead of using queued gtag() updates. 8
Review Tag Consent Settings
Google tags have built-in consent checks. For third-party or custom tags, you may need additional consent requirements.
You can enable the Tag Manager Consent Overview under:
Admin → Container Settings → Enable consent overviewThe overview helps identify:
- Tags without configured consent settings
- Tags with additional consent requirements
- Tags that do not require additional checks
- Potential inconsistencies across the container 9
WordPress Consent Mode Setup
For WordPress, use one reliable implementation method.
Possible methods include:
- Google’s AdSense CMP
- A Google-certified third-party CMP
- A CMP’s official Google Tag Manager template
- A properly developed custom implementation
Complete these checks:
- Use only one active primary CMP.
- Remove outdated cookie-banner plugins.
- Check for duplicate Google tags.
- Make sure the CMP loads on every public page.
- Ensure consent defaults run before analytics and advertising tags.
- Test as a logged-out visitor.
- Clear WordPress, server and CDN caches.
- Review mobile and desktop banners.
- Confirm that accepting and rejecting produce different consent updates.
- Test category, article and landing-page templates.
Avoid activating Consent Mode through a WordPress plugin, Google Tag Manager and custom theme code simultaneously. Duplicate default and update commands can create inconsistent states.
How to Test Consent Mode With Tag Assistant
Google Tag Assistant can verify default consent states and updates.
Step 1: Start a Session
- Open Google Tag Assistant.
- Enter your website URL.
- Connect to the website.
- Open the consent message.
Step 2: Check Default Consent
In Tag Assistant:
- Select the earliest Consent event.
- Open the API Call section.
- Confirm that these parameters appear:
ad_storage
ad_user_data
ad_personalization
analytics_storage
Alternatively, open the tag’s Consent tab and review the On-page Default column.
Step 3: Accept the Message
Select the appropriate acceptance option on your website.
Return to Tag Assistant and select the latest Consent event. Confirm that the On-page Update values reflect the visitor’s selection.
Step 4: Test Rejection and Granular Choices
Start a new private session and test:
- Reject all
- Accept all
- Analytics allowed but advertising rejected
- Advertising storage allowed but personalization rejected
- Consent revocation
Google recommends repeating verification for different simulated geographic locations when region-specific settings are used. 8
Common Consent Mode Problems
Consent Tab Is Empty
This normally indicates that Consent Mode is not implemented on the page.
Check:
- Whether the Google tag is present
- Whether the CMP supports Consent Mode
- Whether Consent Mode is enabled in the CMP
- Whether Tag Manager’s CMP template is published
- Whether a script optimizer is blocking the integration
Default Consent Is Not Set
Define the four primary parameters before Google tags fire:
ad_storage
ad_user_data
ad_personalization
analytics_storage
Do not set the default asynchronously after analytics or advertising tags have already executed. 8
Default Consent Is Set Too Late
An incorrect order might be:
- Google Analytics tag fires
- Advertising tag fires
- Default consent is set to denied
Move the default consent command above all relevant Google tag commands.
Consent Does Not Update
Check whether:
- The CMP’s buttons call an update
- The update uses the correct parameter names
- The visitor’s choice is stored
- The update occurs before page navigation
- Cached JavaScript is serving an older version
- Multiple CMPs are overwriting each other
Consent Is Granted on One Page but Lost on the Next
Consent Mode itself does not store the visitor’s choices. Your CMP must persist the selection and communicate the appropriate state on subsequent pages. 7
Google CMP and Third-Party CMP Both Appear
Do not display two consent messages. Choose one primary CMP and ensure it manages both the user interface and consent signals.
Google advises publishers already using another CMP for Consent Mode signal collection to review their implementation before enabling the same feature through Google’s CMP. 6
Optional Advanced Features
Ads Data Redaction
When ad_storage is denied, you can apply additional advertising-data redaction:
<script>
  gtag('set', 'ads_data_redaction', true);
</script>
When enabled with denied ad storage, this option further redacts advertising click identifiers in supported Google Ads and Floodlight requests. It has no effect when ad storage is granted or Consent Mode is not being used. 7
URL Passthrough
URL passthrough can pass certain click and session information through same-domain URL parameters when cookies cannot be used.
<script>
  gtag('set', 'url_passthrough', true);
</script>
Test this carefully because it can add parameters such as _gl, gclid, dclid or wbraid to internal URLs. Redirects, analytics reports and website functionality must preserve or correctly handle the parameters. 7
Do not enable optional advanced settings without understanding their measurement, privacy and technical effects.
Consent Mode Setup Checklist
Before completing your Google AdSense Consent Mode setup, confirm that:
- A valid consent banner or certified CMP is active.
- The website uses only one primary CMP.
- The AdSense European regulations message is published.
- Advertising Consent Mode is configured.
- Analytics Consent Mode is configured where required.
- The correct Basic or Advanced method has been selected.
- All four Consent Mode v2 parameters are included.
- Default states run before Google tags.
- User choices trigger immediate updates.
- Partial consent choices are respected.
- Consent is preserved across pages.
- Visitors can withdraw or change consent.
- Google Tag Manager uses Consent Initialization.
- Third-party tags have suitable consent checks.
- WordPress does not load duplicate CMP scripts.
- Cache and optimization plugins have been tested.
- Tag Assistant shows defaults and updates.
- Regional behaviour has been reviewed.
- Mobile and desktop messages work correctly.
- A privacy professional has reviewed the legal requirements where necessary.
Frequently Asked Questions
What is Google AdSense Consent Mode?
Consent Mode communicates a visitor’s consent states to supported Google products such as Google Analytics and Google Ads. The AdSense CMP can interpret choices from European regulations messages for these purposes. 3
Does Consent Mode create a cookie banner?
No. You need a CMP, consent banner or custom consent solution to obtain the visitor’s choices. Consent Mode communicates those choices to supported tags. 1
What are the four Consent Mode v2 parameters?
The four core parameters are:
ad_storagead_user_dataad_personalizationanalytics_storage
Is Consent Mode v2 the same as TCF v2.3?
No. Consent Mode is Google’s framework for controlling supported tag behaviour. TCF v2.3 is IAB Europe’s consent framework for CMPs and advertising vendors.
Should I use Basic or Advanced Consent Mode?
Basic blocks Google tags before consent. Advanced loads them with default consent states and may send measurements without cookies when consent is denied. Select an implementation based on your privacy requirements and measurement needs. 4
Does Consent Mode guarantee GDPR compliance?
No. Consent Mode is a technical tool. You remain responsible for consent wording, legal bases, vendor disclosures, privacy policies and all applicable legal requirements.
Can I enable Consent Mode from AdSense?
Yes. Open Privacy & messaging, select the European regulations settings and enable Consent Mode for advertising purposes. You can then optionally enable analytics purposes. 3
How do I know whether Consent Mode is working?
Use Google Tag Assistant. Check the earliest Consent event for default values and the latest Consent event for updated values after a visitor accepts or rejects the message. 8
Can I use Consent Mode on WordPress?
Yes. Use Google’s CMP, a suitable certified CMP plugin or a Google Tag Manager CMP template. Avoid activating multiple implementations simultaneously.
Do I need custom code when using Google’s CMP?
Not always. Google’s CMP can interpret European consent choices for Consent Mode. However, you must still choose an appropriate Basic or Advanced implementation, review regional defaults and verify the setup on every relevant page.
Does Consent Mode apply to AMP messages?
Google’s AdSense documentation says its Consent Mode setting for European regulations messages does not apply to messages displayed on AMP. 6
Conclusion
A correct Google AdSense Consent Mode setup connects your consent-management process with Google Analytics, Google Ads and other supported Google tags.
Start by publishing a suitable European regulations message and enabling Consent Mode for advertising and, where required, analytics purposes. Then select either Basic or Advanced implementation based on your website’s policies and measurement requirements.
Make sure all four Consent Mode v2 signals are configured, set default states before Google tags execute and send updates immediately when visitors change their choices.
Finally, use Google Tag Assistant to test acceptance, rejection, granular choices and consent withdrawal. A visible cookie banner alone is not enough—the underlying consent signals must accurately reflect what the user selected.